
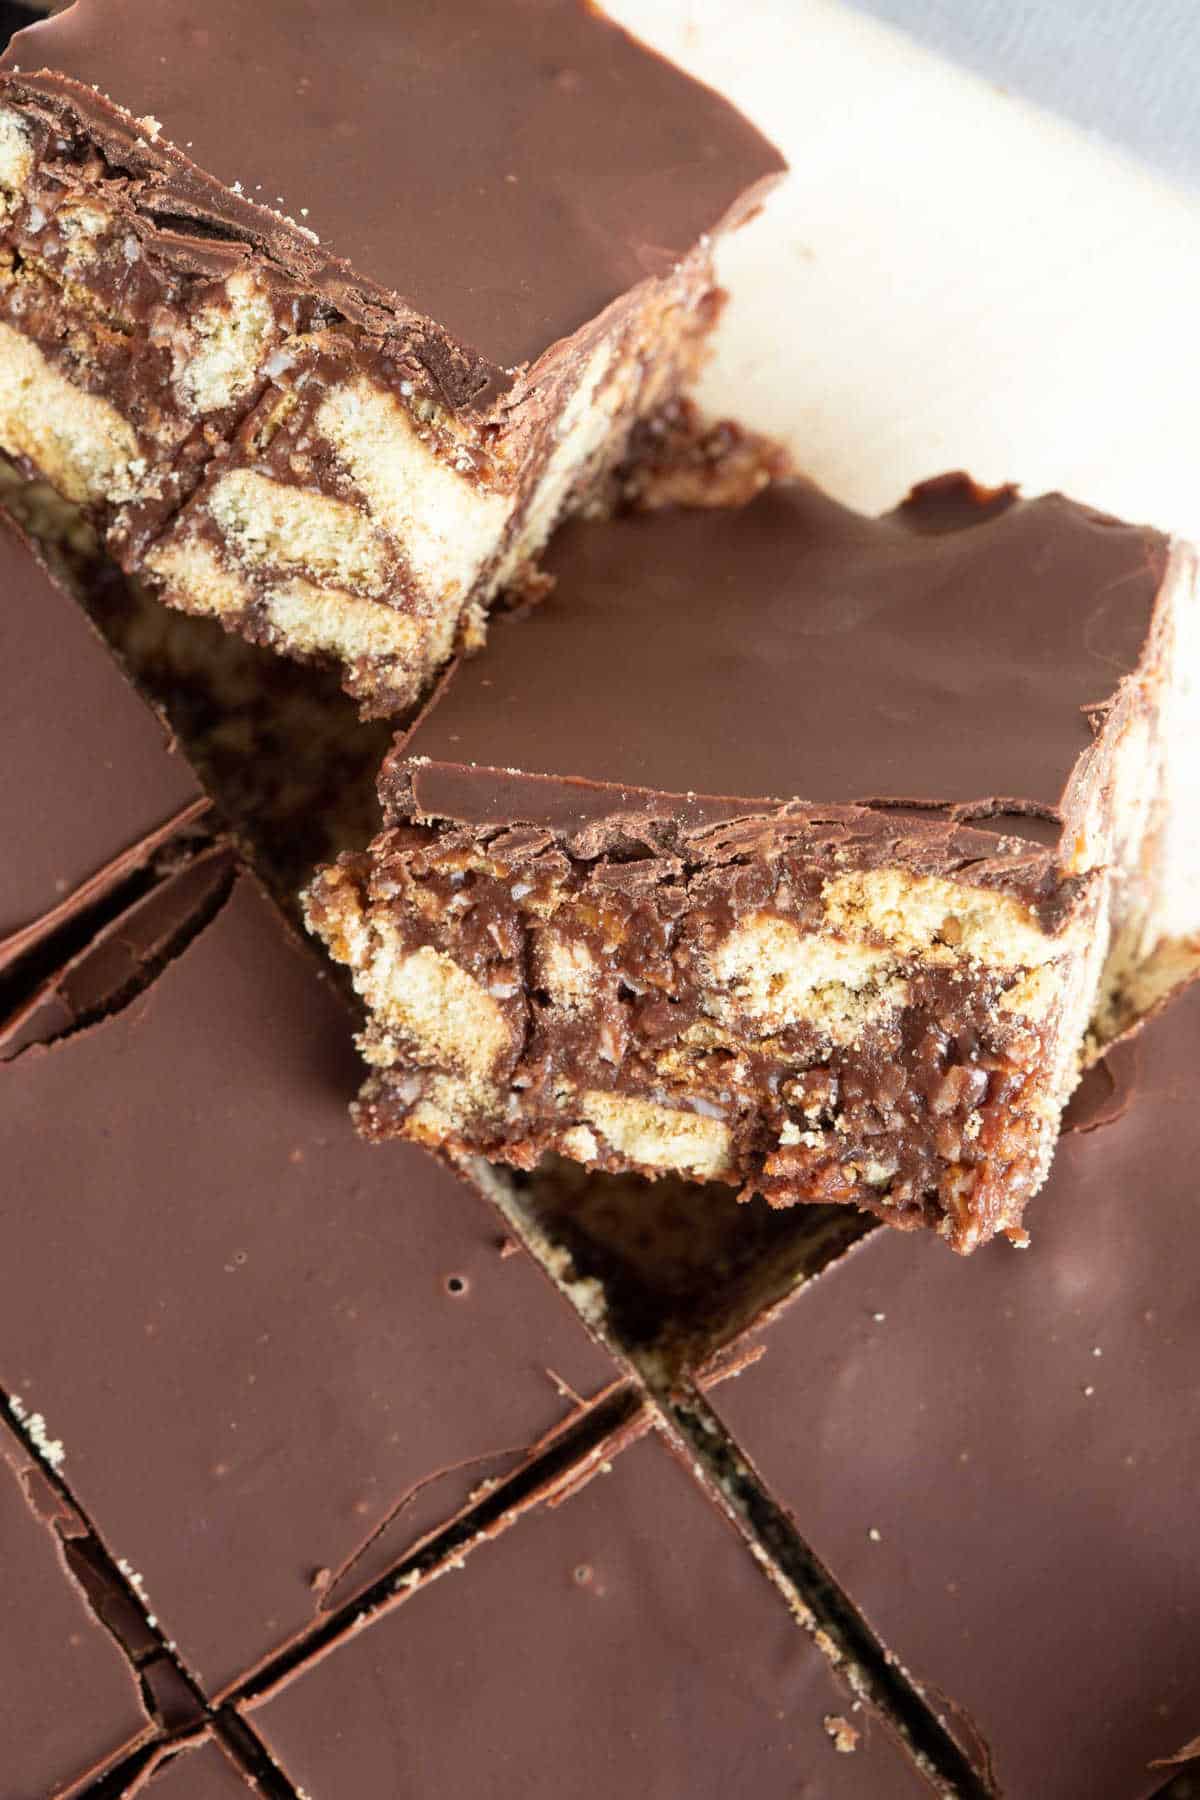
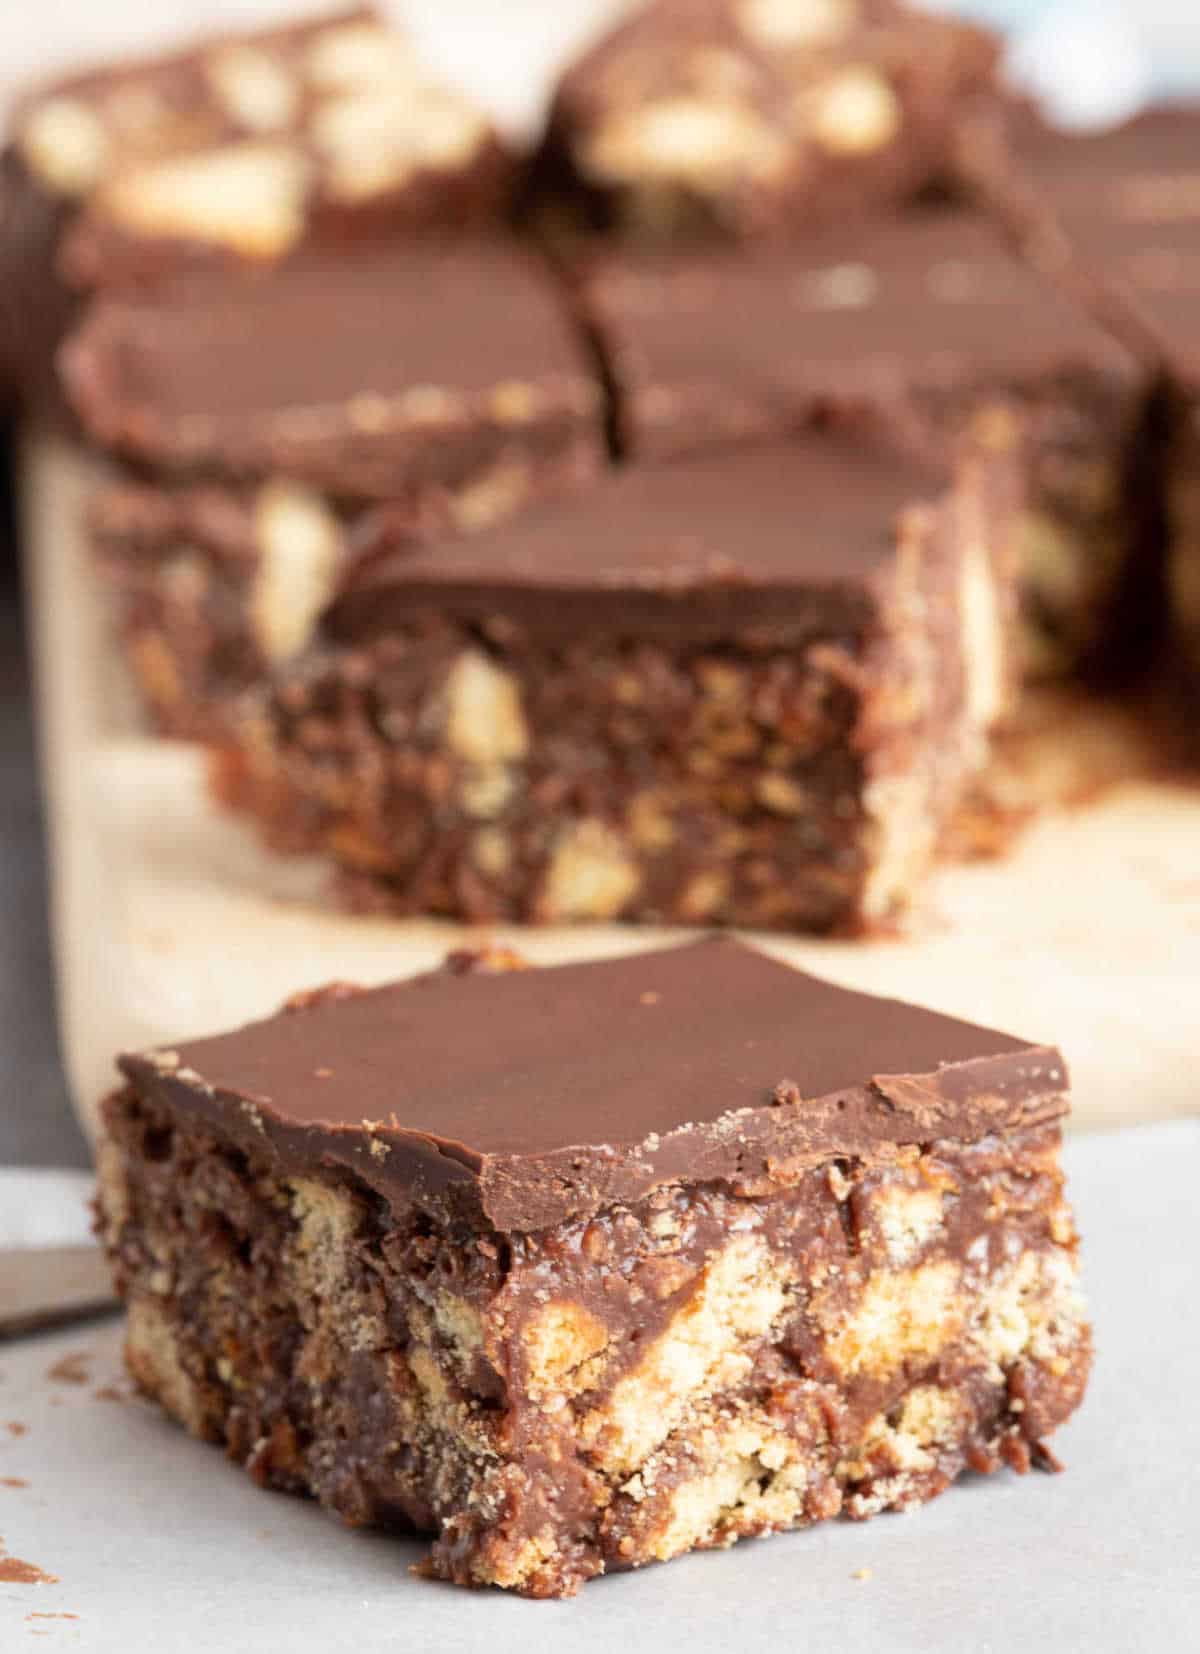
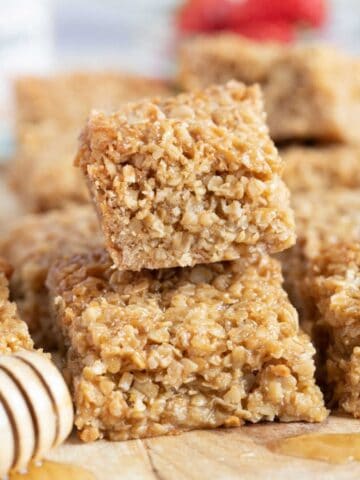
Chocolate hedgehog slice is a classic Australian no-bake chocolate slice made with crushed biscuits, condensed milk, coconut, cornflakes, and chocolate. It's rich, crunchy, easy to make, and requires no oven, making it perfect for lunchboxes, bake sales, parties, and holiday treats, just like my chocolate tiffin recipe!
Save this recipe for later?
Quick Summary - Chocolate Hedgehog Slice
I've been making this chocolate hedgehog slice for years, and it's one of those recipes that never lasts long in our house. I love how quick it is to throw together using everyday pantry ingredients, and because there's no baking involved, it's perfect when I need an easy treat for the kids or something to take to a party or bake sale.
- Beth (Effortless Foodie)
🕒 Ready In: 10 mins prep, 2 hours chilling
👪 Serves: 16
🍽 Calories: 360
🥣 Main Ingredients: Condensed milk, butter, dark chocolate, milk chocolate, cocoa powder, digestive biscuits, cornflakes, and desiccated coconut.
📖 Dietary Info: Vegetarian
👌 Difficulty: Easy
Summarise & Save This Content On
Unlike traditional hedgehog slice recipes that often include nuts, this family-friendly version is nut-free, with crunchy biscuit pieces and cornflakes creating its signature texture.
Made with simple pantry staples including digestive biscuits, desiccated coconut, cornflakes, condensed milk, and melted chocolate, it's an easy no-bake treat that's quick to prepare. If you enjoy a more traditional hedgehog slice, you can easily stir through a handful of chopped walnuts or other nuts, but my kids much prefer it without.
You might also like my no bake chocolate cracknell and oreo tiffin recipes.
Jump to:
✔️ Why you'll love this recipe!
- No baking required
- Made with simple pantry ingredients
- Ready for the fridge in 10 minutes
- Nut-free and kid-friendly
- Perfect make-ahead treat
- Freezer-friendly
- Great for lunchboxes and parties
🥘 Key Ingredients
A full ingredients list along with Metric and US Customary measurements, can be found in the recipe card at the end of this post.
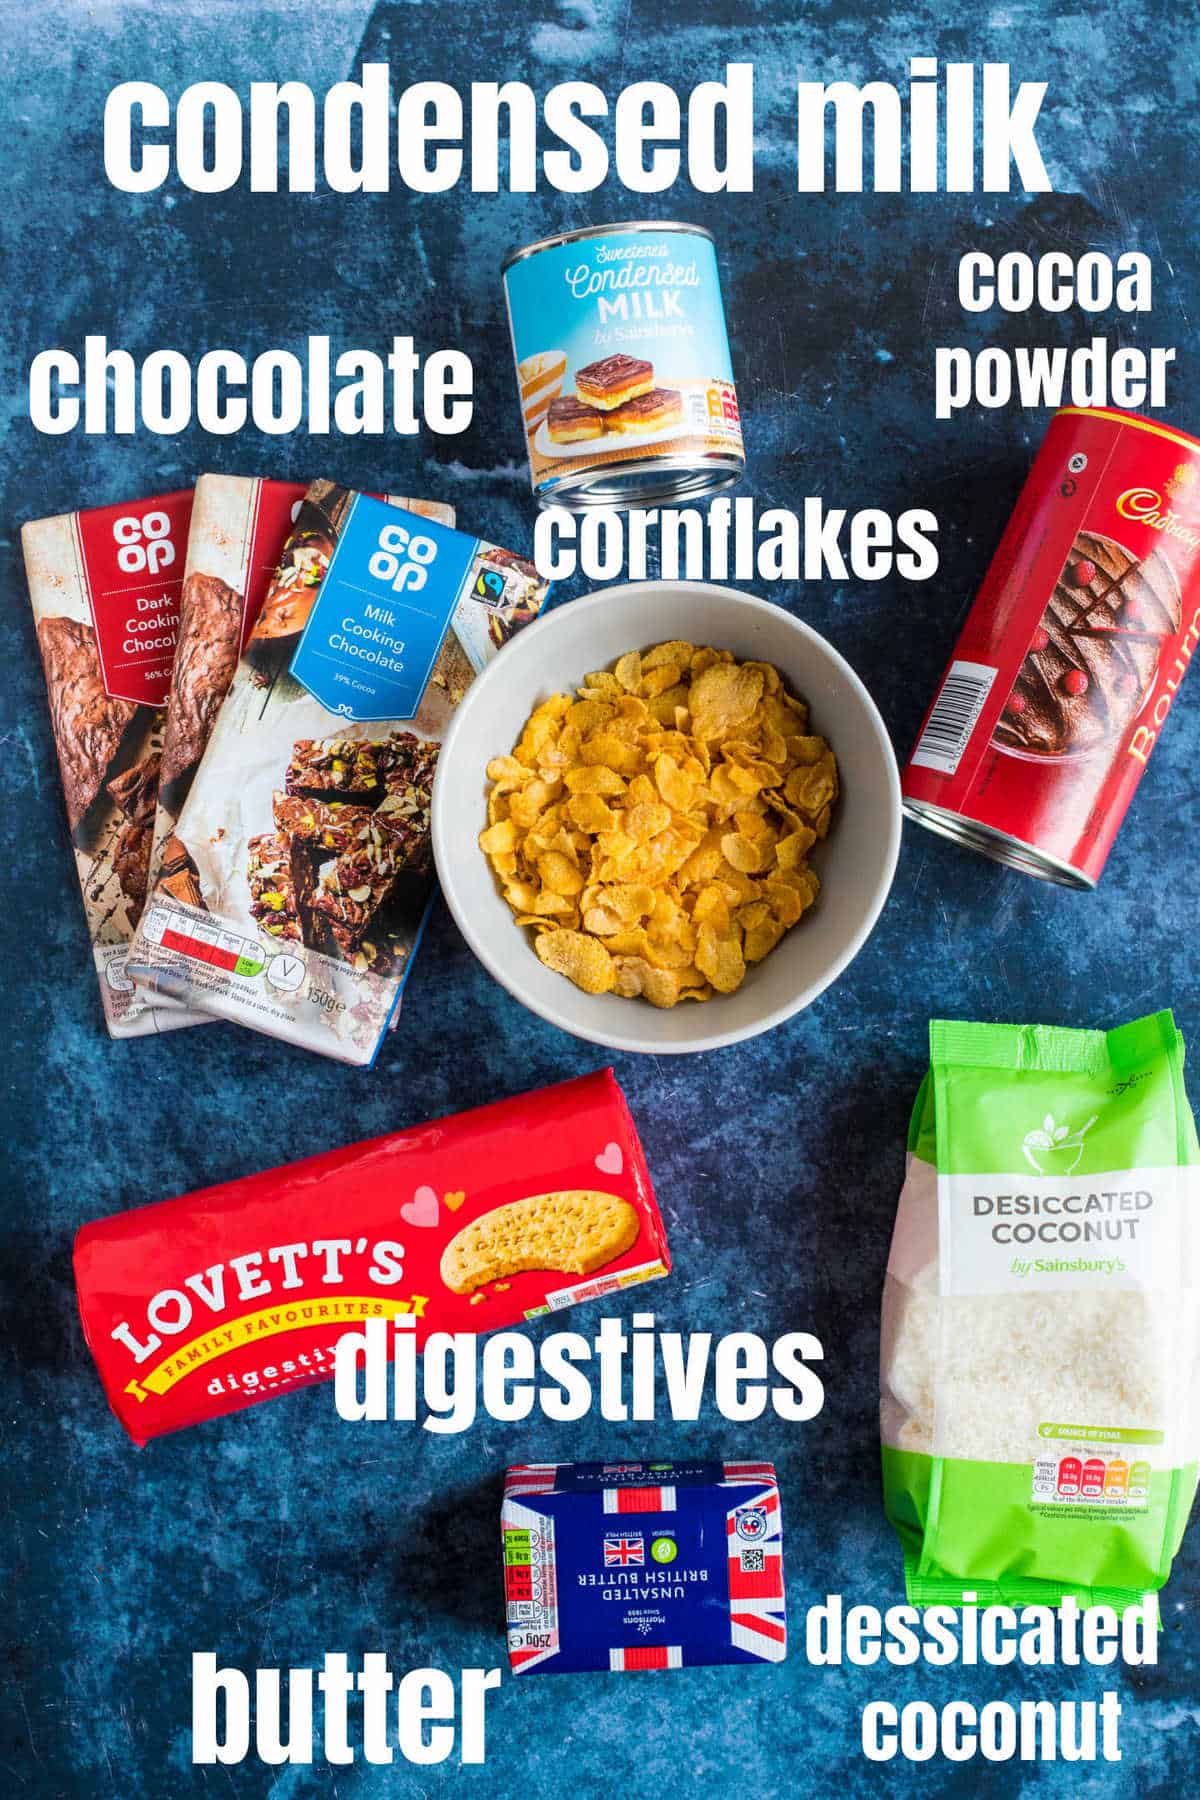
- Condensed Milk - Adds sweetness and helps bind the ingredients together, giving the slice its deliciously chewy texture.
- Butter - Unsalted butter is best, as it lets the chocolate flavour shine through.
- Dark & Milk Chocolate - A combination of dark and milk chocolate creates the perfect balance of rich chocolate flavour and sweetness.
- Cocoa Powder - Boosts the chocolate flavour for an extra indulgent slice.
- Digestive Biscuits - Lightly crush with a rolling pin, leaving some larger pieces for the classic hedgehog texture. You can also use Marie biscuits, shortbread, Rich Tea biscuits, or ginger biscuits.
- Cornflakes - Add a satisfying crunch that contrasts beautifully with the soft chocolate mixture. Rice Krispies can be used instead for a lighter, crispier texture.
- Desiccated Coconut - Adds subtle flavour and texture without overpowering the chocolate.
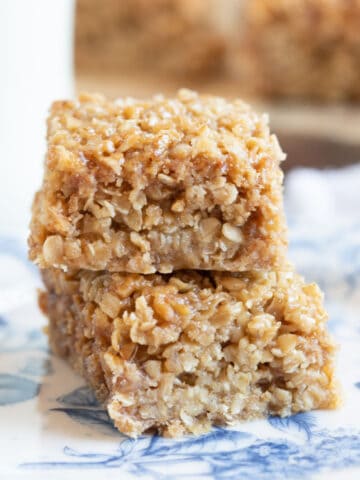
- Chocolate Topping - A simple mixture of dark chocolate, milk chocolate, and a little coconut oil creates a smooth, glossy topping that slices beautifully once set.
Need to substitute an ingredient?
Have an allergy or dietary preference? Let AI customise the recipe for you.
📖 Variations
- Add Nuts - For a more traditional hedgehog slice, stir through a handful of chopped walnuts, hazelnuts, or pecans for extra crunch and flavour.
- Mix in Dried Fruit - Raisins, sultanas, or dried cranberries add a chewy, fruity contrast to the rich chocolate mixture.
- Swap the Biscuits - Experiment with different biscuits such as shortbread, ginger nuts, Marie biscuits, or Rich Tea biscuits. You can even use a combination of leftover biscuits, making this a great recipe for using up the broken pieces at the bottom of the biscuit tin.
🔪 How to make No Bake Hedgehog Slice
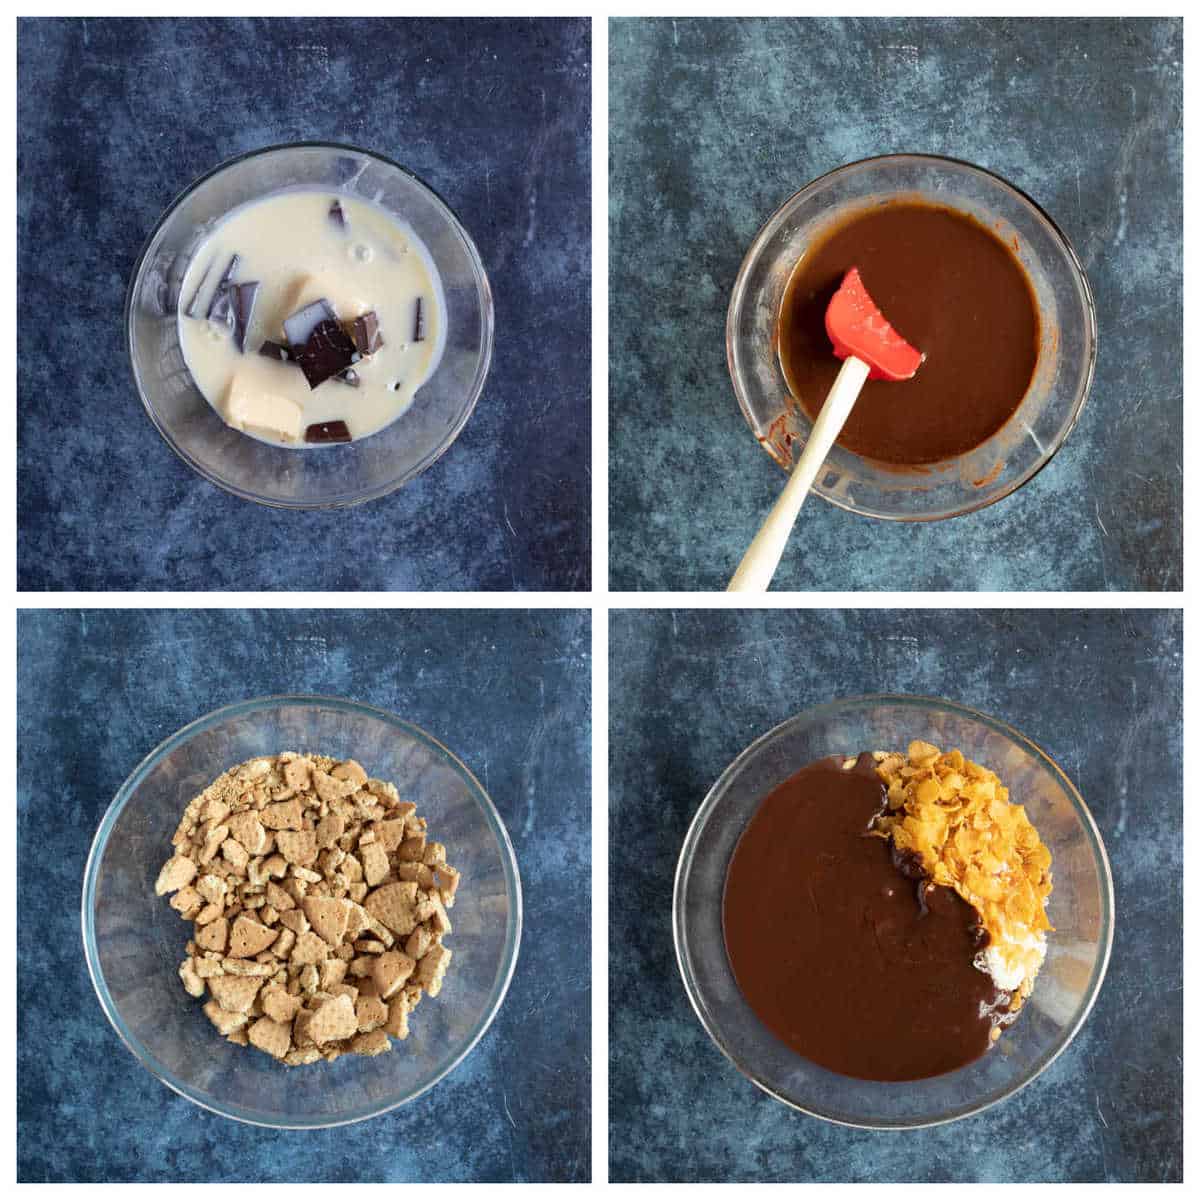
One: Place the condensed milk, butter, dark chocolate, and milk chocolate in a large microwaveable bowl.
Two: Melt in the microwave in 30-second bursts, stirring in-between.
Three: Add the crushed biscuits, cornflakes, desiccated coconut and cocoa powder to the melted chocolate mixture. Give everything a good stir.
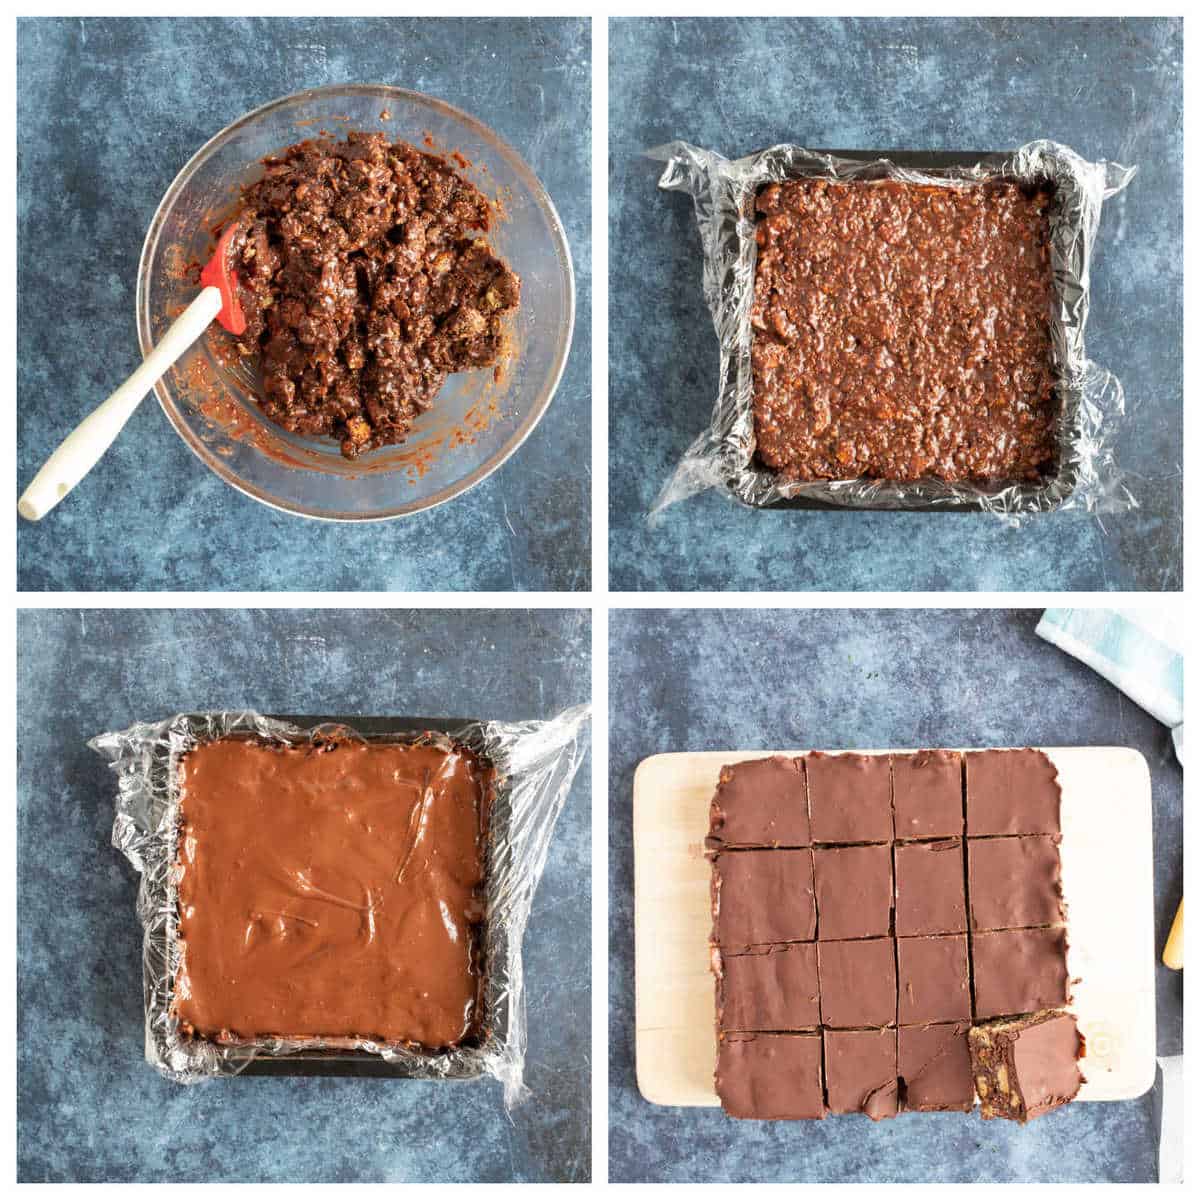
Four: Spoon the mixture into a 20cm square baking tin, lined with clingfilm, and press it down firmly with the back of a metal spoon.
Five: In another microwaveable bowl, melt the dark chocolate, milk chocolate, and coconut oil for the topping (in 20-second bursts stirring in-between). Pour this on top of the hedgehog slice, smooth it with a palette knife, and refrigerate for at least 2 hours but preferably overnight.
Six: Cut into squares and enjoy!
Top Tips
- Don't Skip the Coconut Oil - Adding a little coconut oil to the chocolate topping helps keep it smooth and slightly softer once set, making the slice much easier to cut without the chocolate cracking.
- Leave It at Room Temperature Before Slicing - Take the hedgehog slice out of the fridge 15-20 minutes before cutting. This softens the chocolate topping just enough for cleaner slices and helps prevent it from shattering.
- Use a Hot, Sharp Knife - Dip a sharp knife into boiling water, wipe it dry, and slice. Repeat between each cut for neat, bakery-style squares.
- Choose Good-Quality Chocolate - The better the chocolate, the better the flavour and texture. Good-quality chocolate melts smoothly, while cheaper chocolate can become thick or grainy.
- Don't Crush the Biscuits Too Finely - Leave some larger biscuit chunks for the classic hedgehog look and a satisfying crunch. Finely crushed biscuits will give the slice a denser texture.
- Press the Mixture Firmly into the Tin - Use the back of a spoon or an offset spatula to press the mixture into an even layer. This helps the slice hold together and gives you neat, even squares.
- Chill Until Completely Set - Allow the slice to chill for at least 2 hours, or overnight if you have time. A fully chilled slice is much easier to cut and holds its shape better.
🍴 Serving suggestions
These easy no-bake hedgehog slices are perfect for bake sales and parties. You can make them up to 3 days in advance and store them in the fridge!
They also make a quick and easy after-school treat or dessert for the kids.
Storage
Store: Keep the hedgehog slice in an airtight container in the fridge for up to 1 week. Separate the layers with baking paper to prevent them from sticking together.
Freeze: Freeze individual slices or the whole slab in an airtight container for up to 3 months. Thaw overnight in the fridge before serving.
Make Ahead: This is the perfect make-ahead treat, as it tastes even better after chilling overnight. You can prepare it up to 2-3 days in advance and keep it refrigerated until you're ready to serve.
❓ Hedgehog Slice FAQs
Yes! Hedgehog slice originated in Australia (which is strange as they don't have a lot of hedgehogs!). The easy no-bake slice is now very popular in the UK too.
Yes, hedgehog slices should be stored in the fridge in an air-tight container. This will prevent them from melting on hot days and also retain their freshness.
Yes! Digestive biscuits work beautifully, but you can also use Marie biscuits, Rich Tea biscuits, shortbread, ginger nuts, or even a mixture of leftover biscuits from your biscuit tin
Absolutely. This recipe is completely nut-free, making it ideal for school lunchboxes and anyone with a nut allergy. If you prefer a more traditional version, you can stir through a handful of chopped walnuts or hazelnuts.
Troubleshooting Guide
Slice too soft? Chill for longer (preferably overnight) and make sure the ingredients were measured accurately.
Chocolate topping cracked? Let the slice sit at room temperature for 15-20 minutes before cutting and use a warm knife.
Chocolate turned grainy? Melt the chocolate gently over a low heat or in short bursts in the microwave to avoid overheating.
Slice falling apart? Press the mixture firmly into the tin before chilling so it holds together well.
Difficult to cut? Dip a sharp knife in hot water, wipe it dry, and repeat between each slice for clean edges.
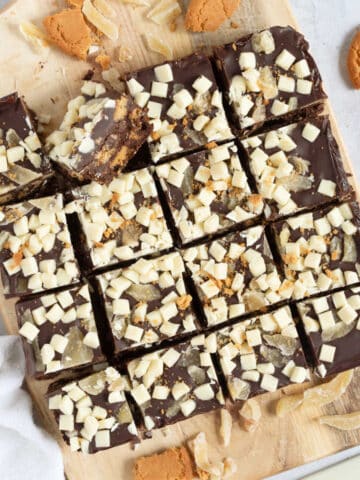
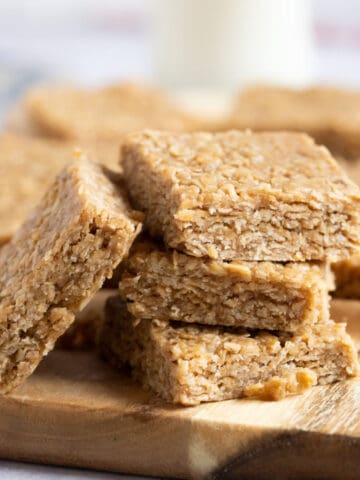
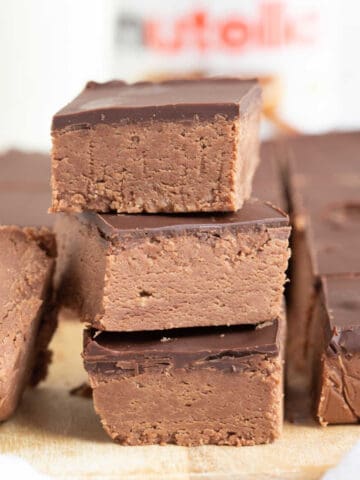
😋Related recipes
More no-bake treats to try!


Tried it? Let me know what you think and rate it ⭐️ below. Tag me @effortlessf00d-I'd love to see! Don't forget to subscribe for more recipes.
Recipe

Chocolate Hedgehog Slice Recipe
Save this recipe for later?
Equipment
- Cling Film
- Palette Knife
Ingredients
- 397 g Condensed Milk
- 100 g Butter
- 100 g Dark Chocolate broken into squares
- 50 g Milk Chocolate broken into squares
- 2 tablespoon Cocoa Powder
- 250 g Digestive Biscuits crushed
- 45 g Cornflakes crushed
- 70 g Desiccated Coconut
For the topping
- 100 g Dark Chocolate
- 100 g Milk Chocolate
- 2 tablespoon Coconut Oil
Instructions
- Line a 20cm (8-inch) square baking tin with baking paper or cling film (plastic wrap), leaving an overhang on two sides. This makes it easy to lift the hedgehog slice out of the tin once it's set and ready to cut.
- Place the condensed milk, dark and milk chocolate and butter in a large microwaveable bowl and melt in the microwave in 30 second bursts (stirring in-between until melted).397 g Condensed Milk, 100 g Butter, 100 g Dark Chocolate, 50 g Milk Chocolate
- Add the crushed biscuits, cornflakes, desiccated coconut and cocoa powder to the melted chocolate mixture. Give everything a good stir.250 g Digestive Biscuits, 45 g Cornflakes, 70 g Desiccated Coconut, 2 tablespoon Cocoa Powder
- Press the mixture into the tin (use the back of a metal spoon to make sure it is compacted).
- Melt the topping ingredients together in the microwave in 20 second bursts (stirring in-between). Pour onto the hedgehog slice and smooth with a knife.100 g Dark Chocolate, 100 g Milk Chocolate, 2 tablespoon Coconut Oil
- Place in the fridge to set for at least 2 hours.
- Remove the tin from the fridge about 20 minutes before slicing to soften the chocolate topping slightly. Lift the slice out using the overhanging baking paper or cling film and place it on a chopping board. Using a sharp knife dipped in hot water and wiped dry between each cut, slice into squares or bars. Store in an airtight container in the fridge.
Notes
- Leave some larger biscuit pieces for the classic hedgehog texture.
- Use good-quality chocolate for the smoothest filling and topping.
- Don't skip the coconut oil in the topping-it helps prevent the chocolate from cracking when sliced.
- Let the slice stand at room temperature for 15-20 minutes before cutting.
- Use a sharp knife dipped in hot water and wiped dry between cuts for neat edges.
- Store in an airtight container in the fridge for up to 1 week, or freeze for up to 3 months.


Beth says
Oh my goodness! We love no bake desserts and this one looks amazing! My hubby and daughter are going to be all over this. So excited to give this a try this week!
Lindsay says
I love no-bake treats like this in the summer months. Making this one next week for the kiddos! thanks.
Claudia Lamascolo says
What this is so unique and I am always looking for anything with chocolate and coconut recipes this is on my must make list!
Caroline says
This takes me back to childhood! Easy bars like this are great for a crowd, looks yummy.
Danielle Wolter says
Absolutely loved this - it was ultra easy to make and just so delicious!