These easy cherry and almond scones are the perfect tea-time treat! They're also great for taking on picnics, and I've even been known to eat one for breakfast!
Serve with fruity jam and thick clotted cream for the ultimate cherry scone experience!
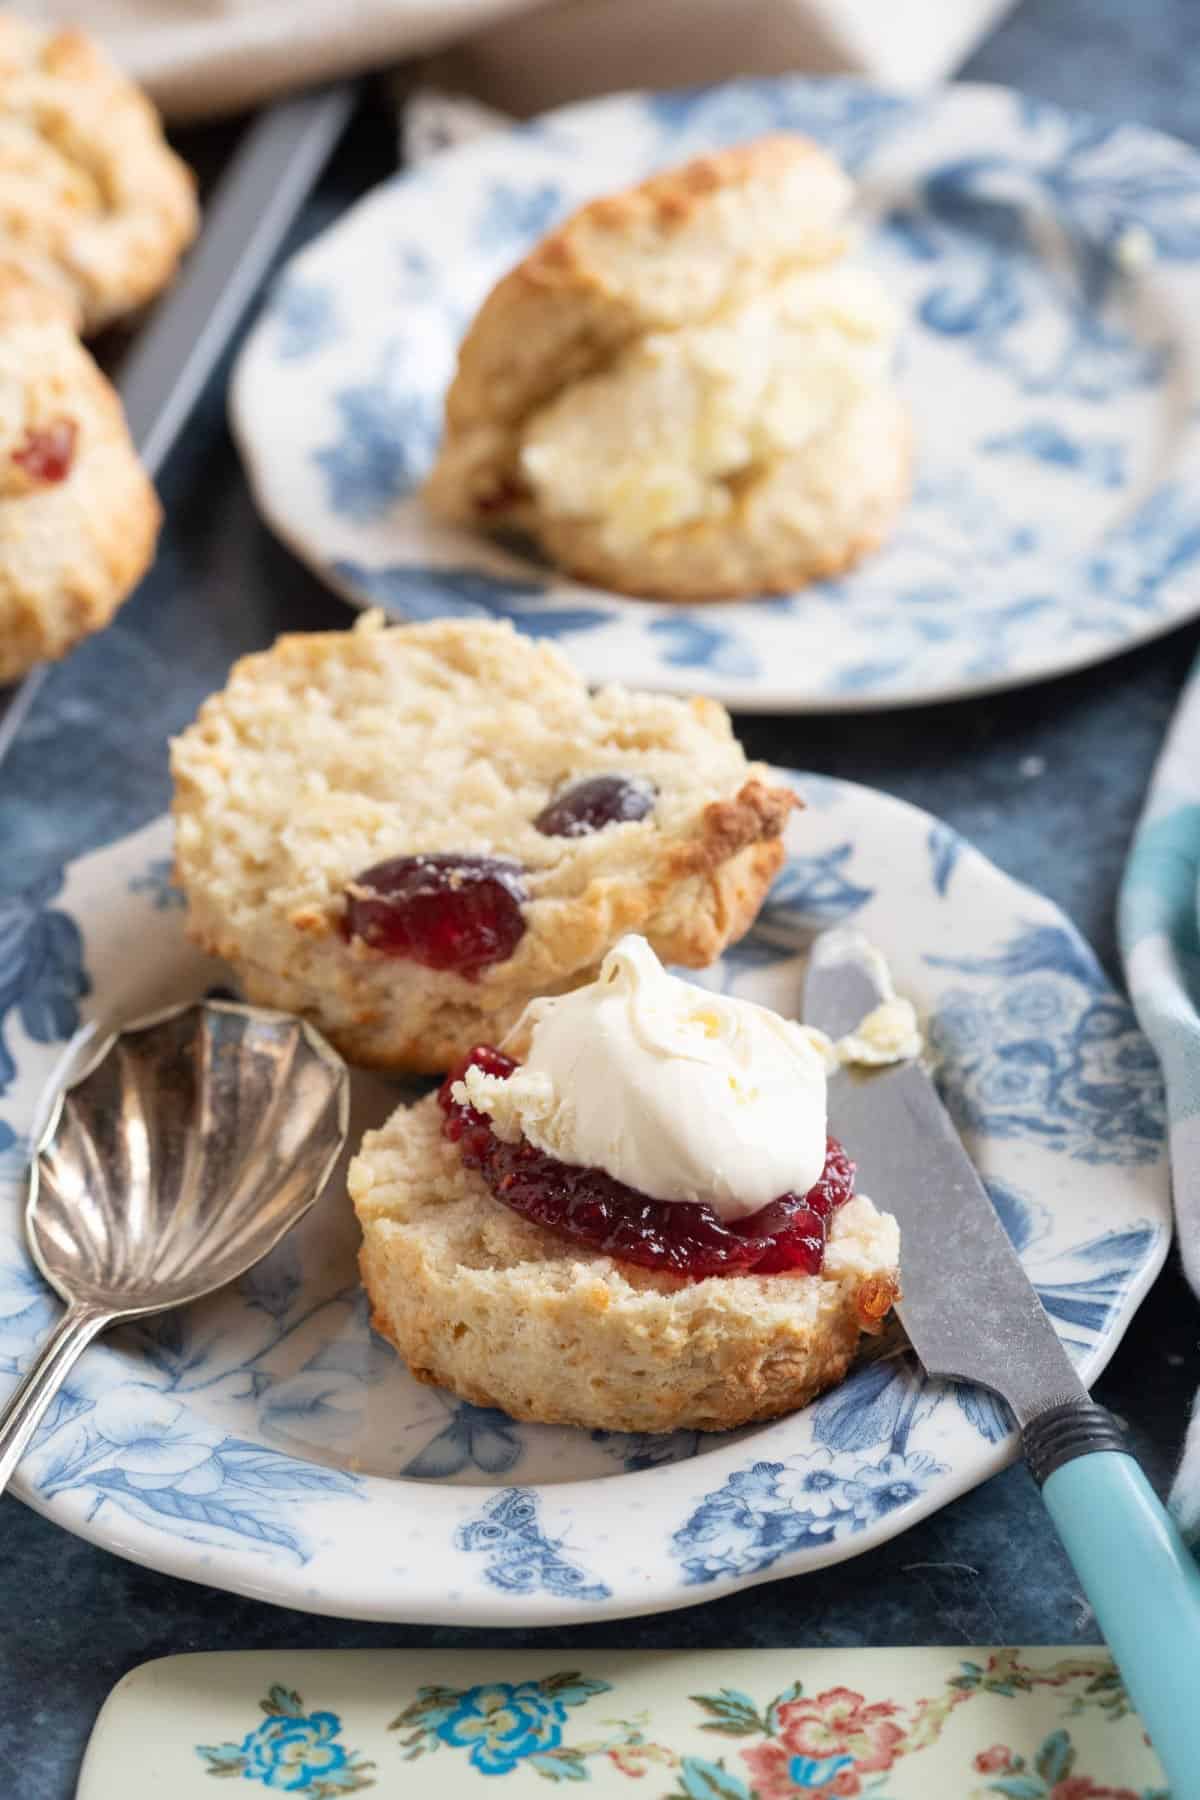
I'm from Cornwall, so it's pretty much a given I'm going to LOVE scones (and I really do!), especially when they're spread with my favourite jam and a big dollop of clotted cream on top, and served with a pot of English tea!
💡 Top Tip - it's always jam first...unless you live in Devon!
These homemade cherry almond scones are beautifully light and fluffy in texture thanks to the use of buttermilk in the recipe, and a bit more interesting in flavour than traditional plain scones.
👩🍳 Love scones? Try my date and walnut scones too!
Jump to:
✔️ Why you'll love this recipe!
Here's why this is the best cherry scone recipe!
- Easy to make - my 6 year old can make these largely unsupervised, so they are a great recipe for first-time bakers.
- Ready in under 30 minutes.
- Only a handful of ingredients - most of which you will already have in your baking cupboard.
- Adaptable - easily swap the cherries for another fruit.
- Freezer-friendly.
🛒 Ingredients
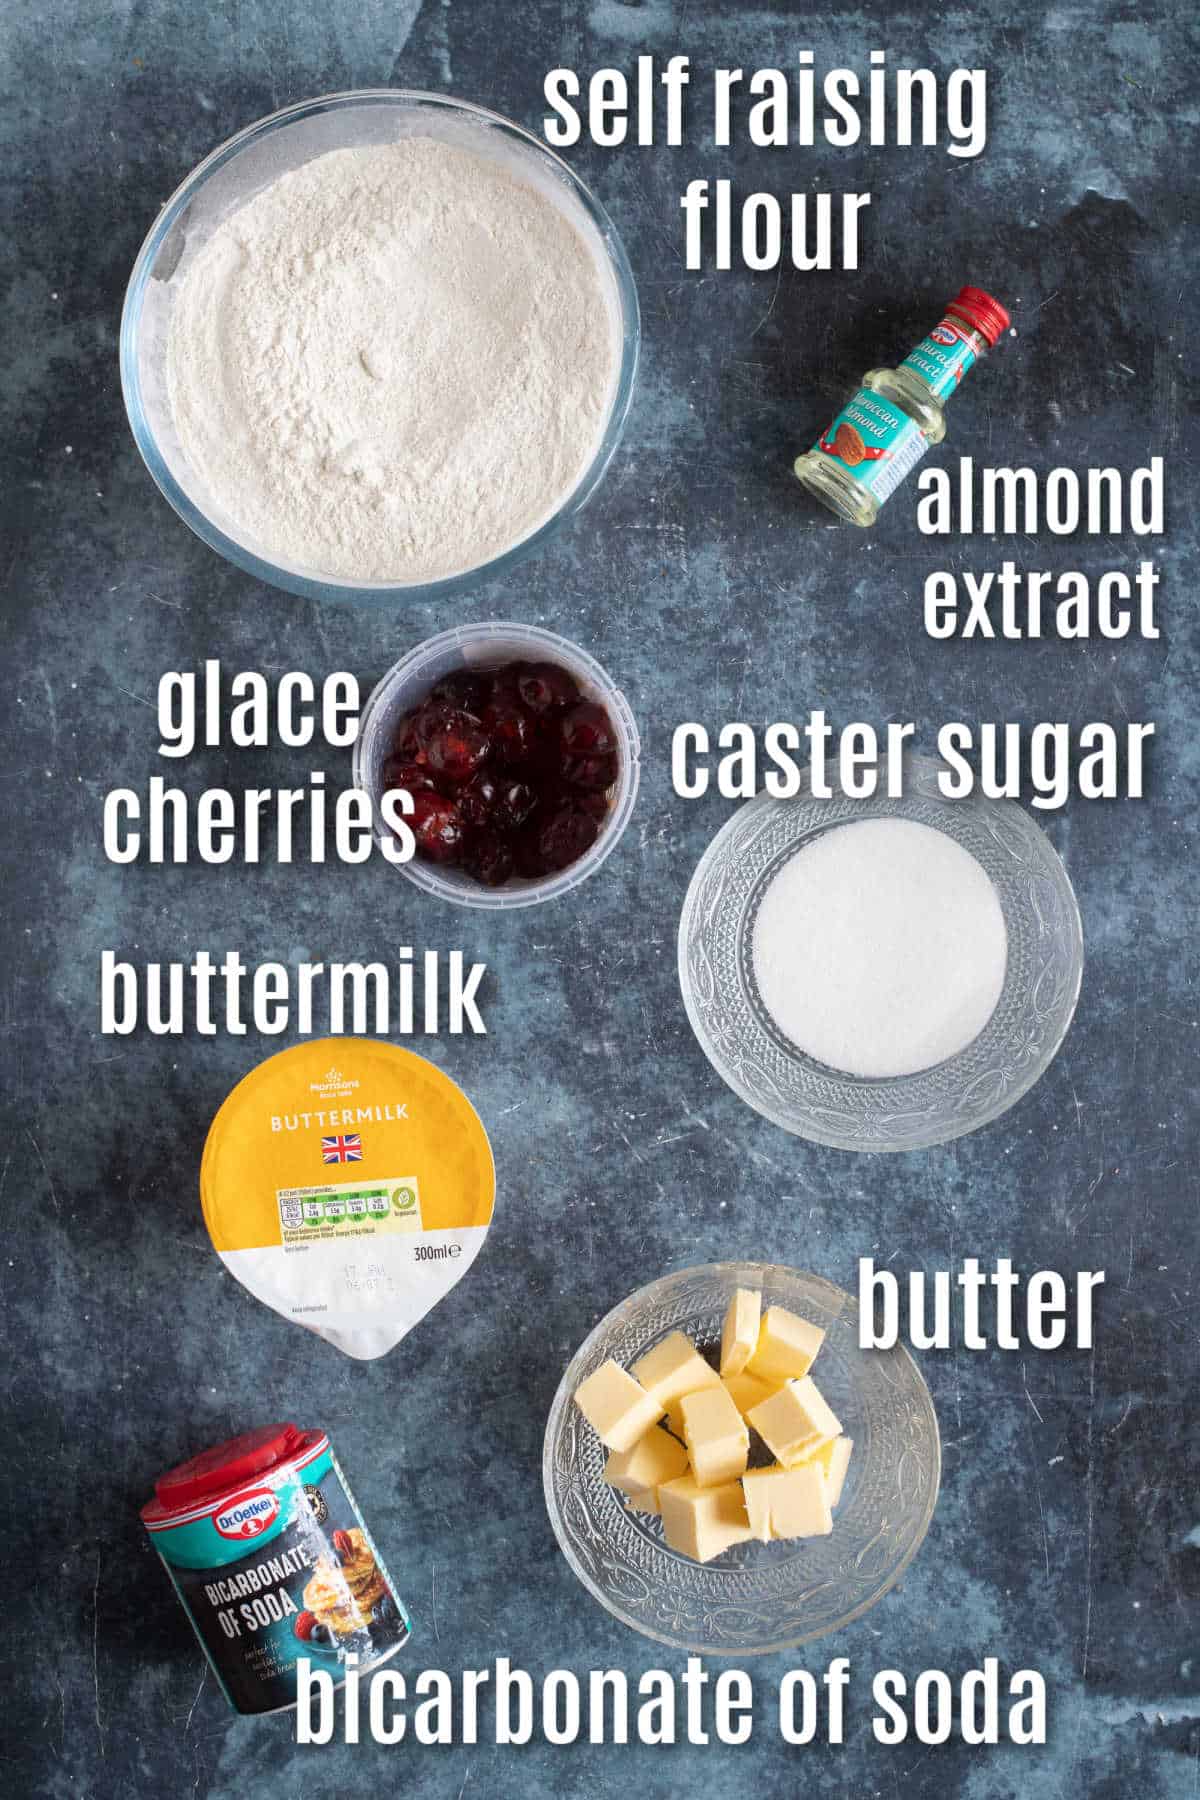
- Self Raising Flour - I use white self raising flour, but you could use wholemeal self raising flour, or even half and half. Self raising flour already has raising agent added which helps the scones rise.
- Bicarbonate of Soda - creates more rise in the scones.
- Salt - for flavour.
- Sugar - I've used caster sugar but you could swap for granulated sugar if you prefer.
- Butter - cubed and fridge cold.
- Buttermilk - to ensure the scones are light and fluffy.
- Glacé Cherries - or you could swap for dried or fresh cherries instead.
- Almond Extract
- Milk - to glaze
- Flaked Almonds and Demerara Sugar - for the top (optional extra)
🔪 How to make cherry and almond scones
The recipe card with ingredient quantities and detailed instructions can be found at the bottom of the post
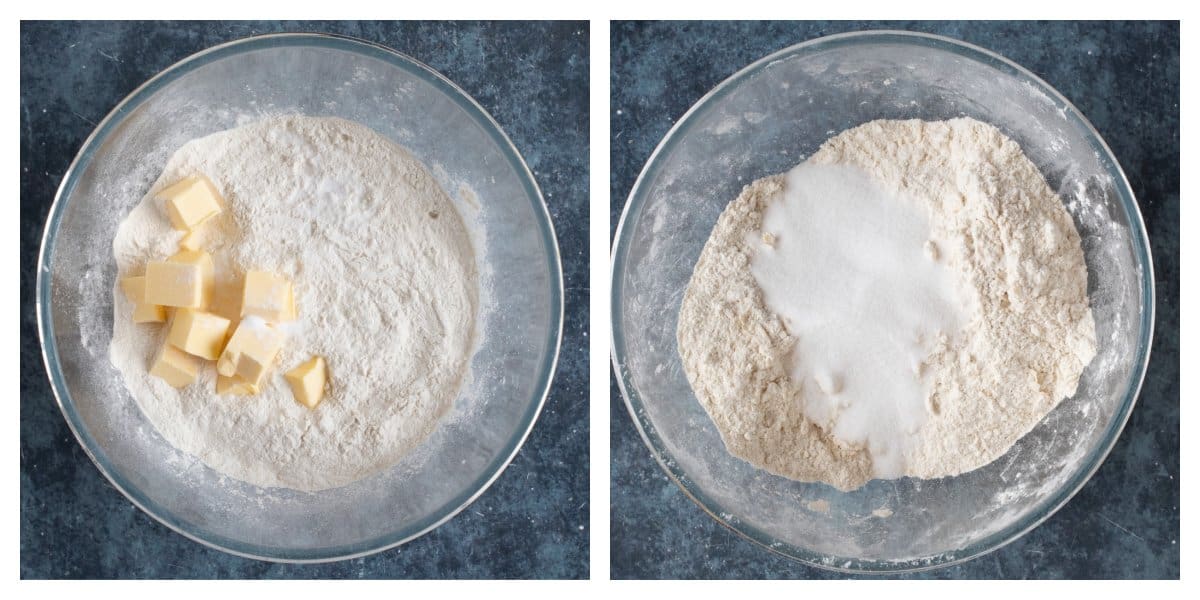
One: Sieve the flour into a large mixing bowl and stir in the bicarbonate of soda and salt. Rub the cold cubed butter in with your hands until you get a breadcrumb consistency.
Two: Stir in the sugar with a metal knife.
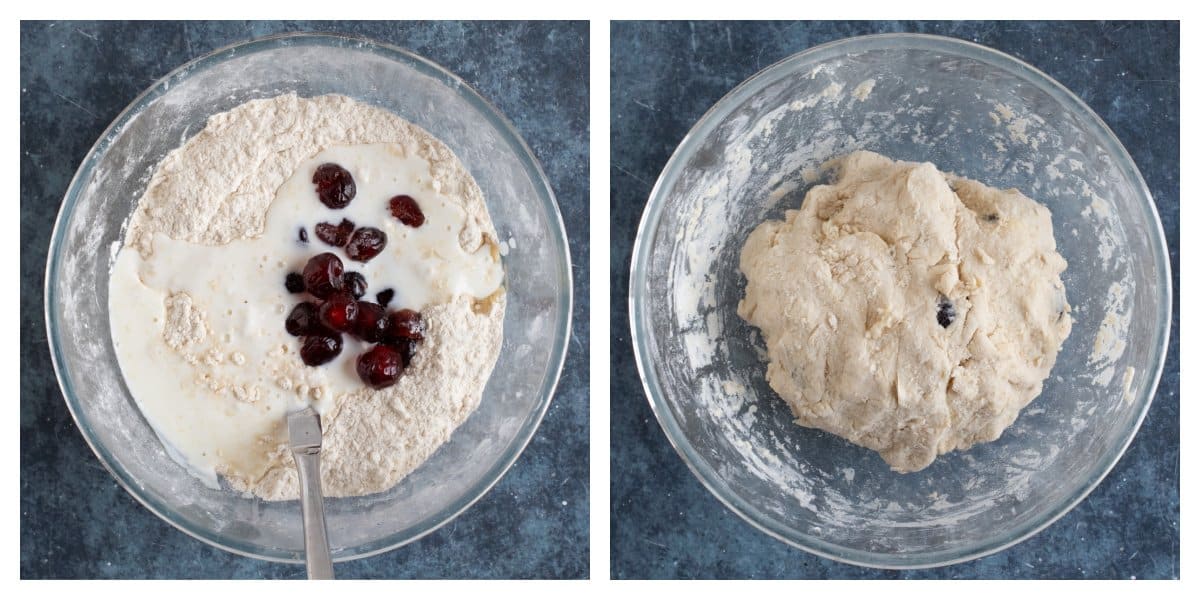
Three: Add the buttermilk to the flour, along with the glace cherries and almond extract. Use the metal knife to mix it in.
Four: Use your hands to form a dough, handling it as little as possible. You don't want the dough to get warm.
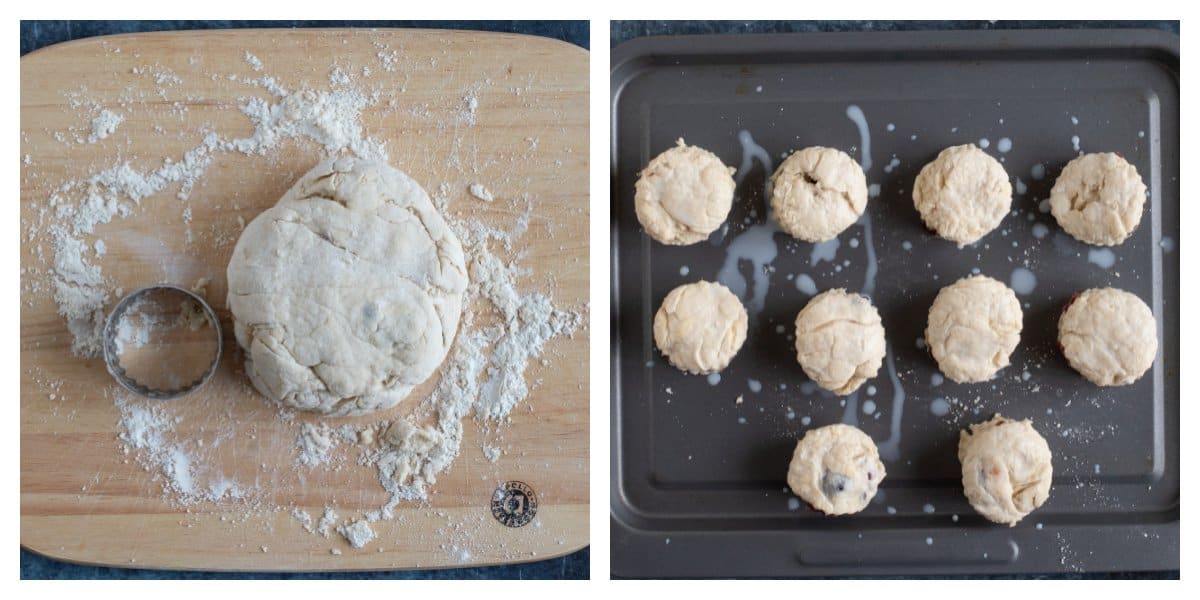
Five: Flour a worktop or wooden board and using your hands (no need for a rolling pin), shape it into a round, about 4cm thick. Use a biscuit cutter to stamp out the scones (try not to twist the cutter otherwise the tops will bake unevenly). Depending on the size of the biscuit cutter, you should get around 8-10 scones from the recipe (I personally find a 5cm cutter works best). You'll need to reform the dough a few times to get the maximum amount of scones from the dough.
Six: Place the scones on a non-stick baking tray (you can line your baking tray if you wish) and glaze the tops with milk, and sprinkle with flaked almonds and demerara sugar, if using. Bake for 12-14 minutes.
💭 Top tips
- If you can't get hold of buttermilk, you can make your own buttermilk by squeezing some lemon juice into milk and leaving it to stand at room temperature for 15 minutes before using it. The buttermilk helps the scones to become light and fluffy.
- 💡 Pro Tip: Homemade buttermilk is thinner than commercially produced buttermilk. You may not need to use the full amount as it could make your dough too thin and sticky. If using homemade buttermilk, add half the amount to start with and gradually add more if needed in order to make a soft dough.
- Always use cold cubed butter straight from the fridge. If you try to rub in soft warm butter you will be left with a sticky mess. Cold butter helps to keep the dough cool and give the scones the perfect flakey texture once baked.
- You don't need a rolling pin to roll out the dough. Just shape it with your hands for rustic looking scones.
- Feel free to halve the glacé cherries, but if you don't have time, don't worry. I quite like finding big chunky whole cherries in my scone!
- For sweet scones use the fluted edge of the biscuit cutter.
🍴 Serving suggestions
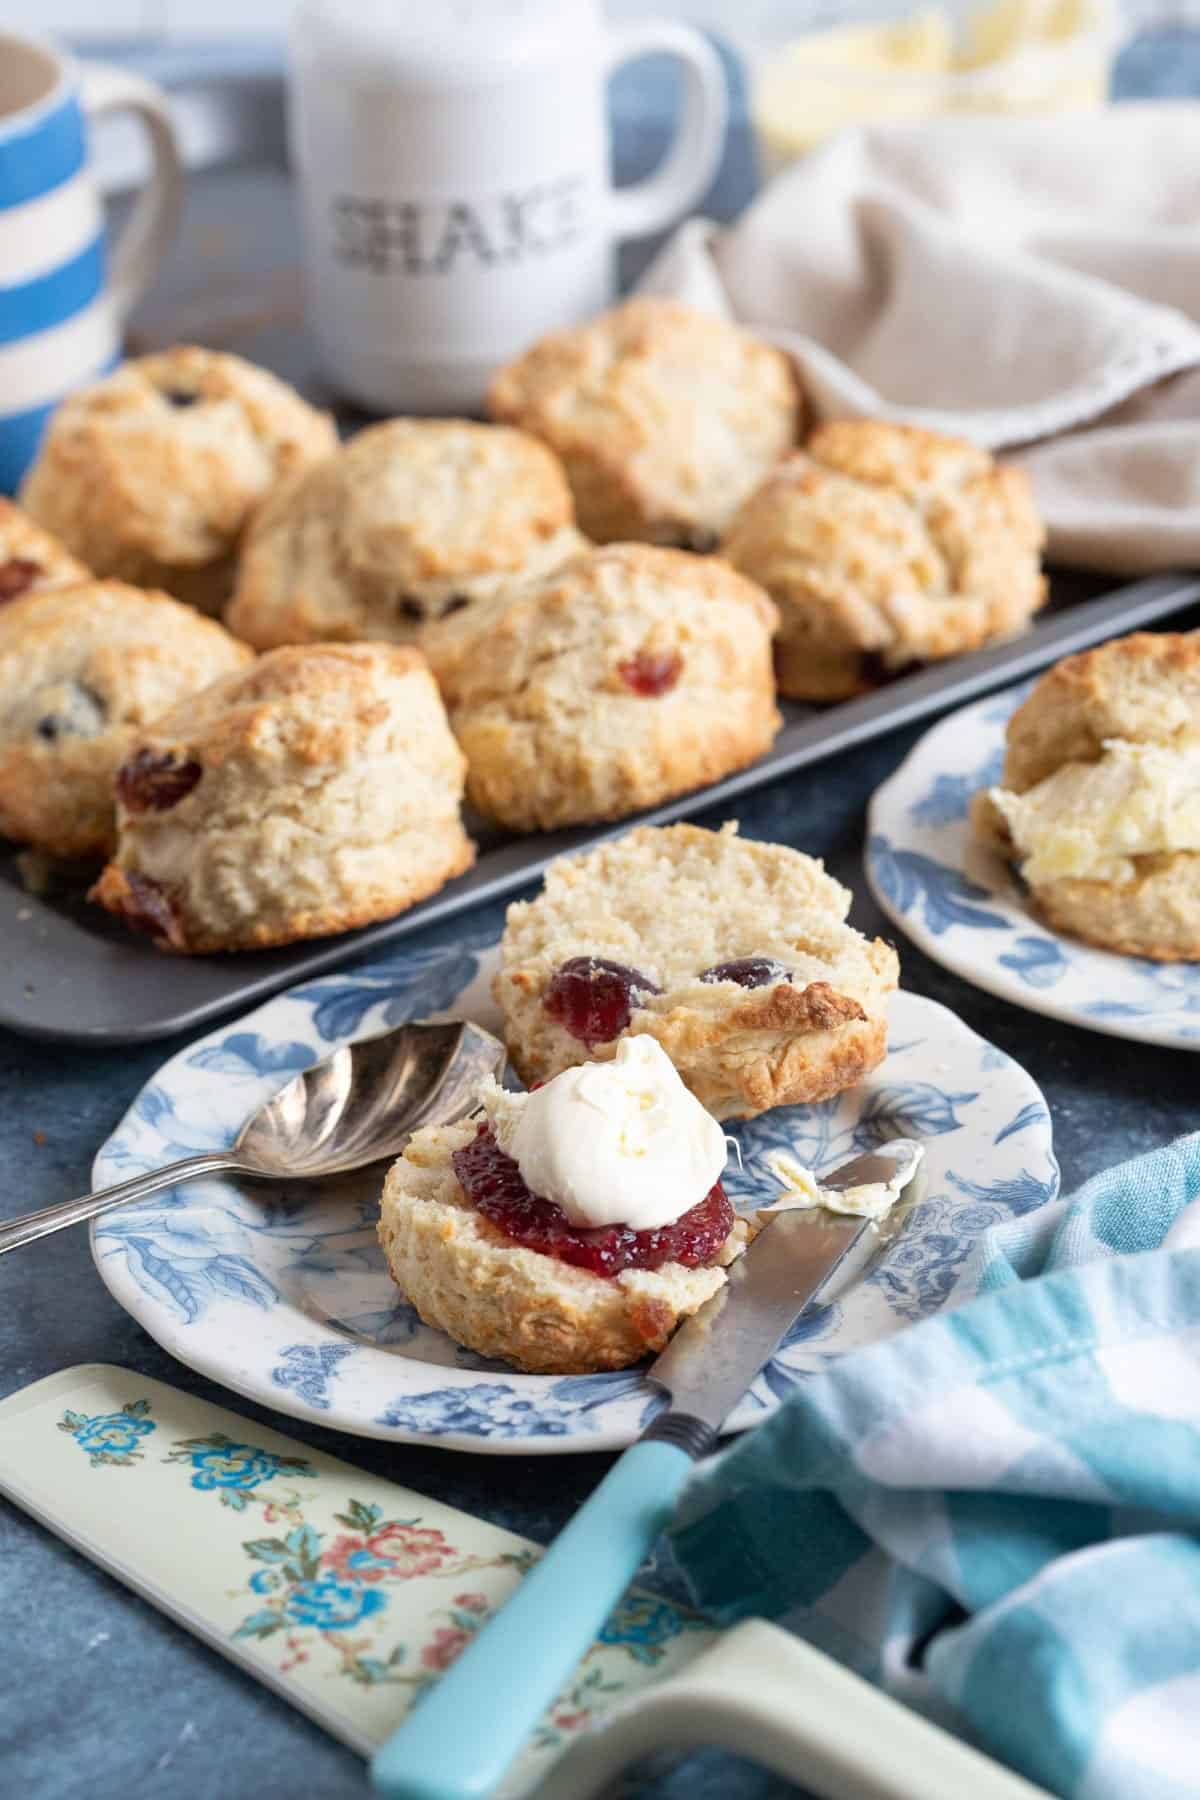
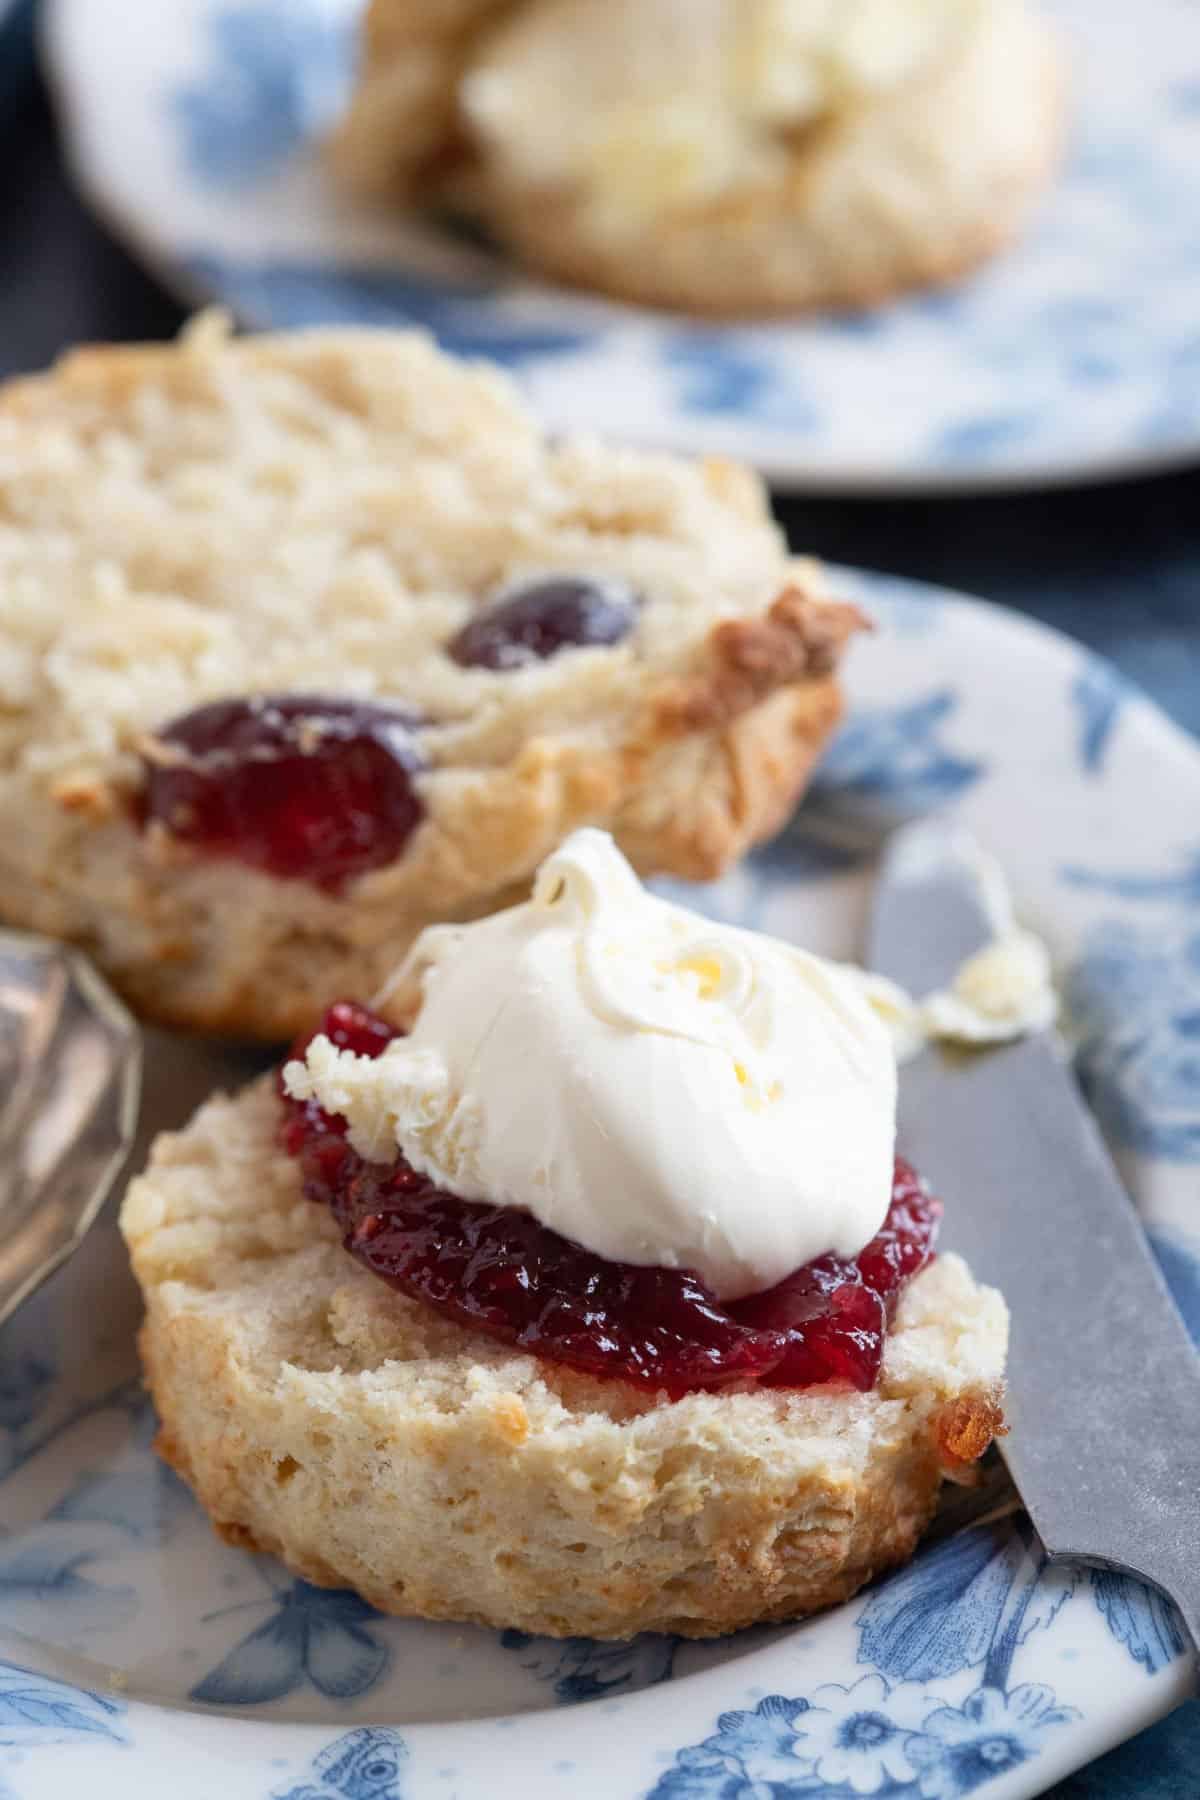
Serve the cherry and almond scones warm with butter, or for something more indulgent, jam and clotted cream!
If I'm making them for afternoon tea, I'll often serve the cherry scones on a cake stand with mini sausage rolls, cucumber sandwiches, and other sweet treats.
📖 Variations
- Use wholemeal self-raising flour or half wholemeal and half white.
- Instead of using glacé cherries, try using dried cherries or fresh pitted cherries. If using fresh cherries you will need to increase the amount of sugar in the recipe to 100g.
- Swap the cherries for currants and make my easy fruit scones.
- Make traditional Victoria scones, which has an egg in the recipe for richness!
- Sprinkle the tops of the scones with demerara sugar and flaked almonds before baking, for an extra special crunchy topping.
- Add in 50g of dark chocolate chips for cherry and chocolate scones.
- Don't like almond? Swap with vanilla extract instead and make cherry and vanilla scones.
British scones vs American scones
- Britain - scones are generally cut into rounds with a plain or fluted-edged cutter. Traditional scones are left plain, but sometimes they contain dried fruit. The tops are brushed with milk or egg for a golden finish. After baking the scones are usually served split in half, with jam THEN clotted cream, or simply a smear of butter. Savoury cheese scones are also popular in the UK and made in the same way.
- America - the popular scone shape in the US iseems to be a triangular wedge. The dough is almost always sweeter than their British counterparts, with more sugar added, and they are finished with a glaze or sugary topping of some sort.
🥡 Storage
Scones are best eaten fresh out of the oven, whilst still warm.
- To Store. Keep in an airtight container for up to 3 days.
- To Reheat. Sprinkle the scones with a little water and pop back into a hot oven for a few minutes to warm through.
- To Freeze. Scones freeze really well. Place the cooled scones into a freezer-safe container and freeze for up to 3 months. Defrost at room temperature and reheat in the oven or microwave.
❓ FAQs
The tops of the scones should be a rich golden brown colour, and when you pick the scone up and tap the bottom, it should sound hollow.
Traditional buttermilk is a thin, cloudy, slightly tart but buttery-tasting liquid that’s the by-product after cream is churned to make butter. These days it is more commonly sold as a thick liquid (usually next to the cream in the supermarket), produced commercially by adding an acidifying bacteria to milk.
Using fridge-cold butter produces the flakiest, lightest scones. If the dough is allowed to get too warm (by using room temperature butter and also handling the dough too much), your scones will turn out dense and heavy. What you are looking for is a light, fluffy and flaky texture when you break one in half.
Plain flour can be used in place of self-raising flour, but you will need to add baking powder to ensure the scones rise. Add 2 teaspoons of baking powder to every 150g of plain flour for homemade self-raising flour.
😋 More baking recipes
Recipe
Cherry and Almond Scones
Equipment
- Mixing Bowl
- Measuring Spoons
- Baking Sheets
Ingredients
- 450 g Self Raising Flour
- 1 teaspoon Bicarbonate of Soda
- ½ teaspoon Salt
- 100 g Butter cubed and fridge cold
- 50 g Caster Sugar
- 300 ml Buttermilk
- 1 teaspoon Almond Extract
- 120 g Glacé Cherries
- 3 tablespoon Milk for glazing
Optional
- 2 tablespoon Demerara Sugar
- 2 tablespoon Flaked Almonds
Instructions
- Preheat the oven to 220°c (200 fan/ Gas 7) and line a baking tray with baking paper.
- Sieve the flour into a large mixing bowl and stir in the bicarbonate of soda and salt450 g Self Raising Flour, 1 teaspoon Bicarbonate of Soda, ½ teaspoon Salt
- Rub the cold cubed butter in with your hands until you get a breadcrumb consistency.100 g Butter
- Stir in the sugar with a metal knife.50 g Caster Sugar
- Add the buttermilk to the flour, along with the glace cherries and almond extract. Use the metal knife to mix it in.300 ml Buttermilk, 1 teaspoon Almond Extract, 120 g Glacé Cherries
- Use your hands to form a dough, handling it as little as possible. You don't want the dough to get warm.
- Flour a worktop or wooden board and using your hands (no need for a rolling pin), shape it into a round, about 4cm thick. Use a biscuit cutter to stamp out the scones (try not to twist the cutter otherwise the tops will bake unevenly). Depending on the size of the biscuit cutter, you should get around 8-10 scones from the recipe (I personally find a 5cm cutter works best). You'll need to reform the dough a few times to get the maximum amount of scones from the dough.
- Place the scones on a non-stick baking tray (you can line your baking tray if you wish) and glaze the tops with milk, and sprinkle with flaked almonds and demerara sugar, if using. Bake for 12-14 minutes.3 tablespoon Milk, 2 tablespoon Demerara Sugar, 2 tablespoon Flaked Almonds
Notes
- If you can't get hold of buttermilk, you can make your own buttermilk by squeezing some lemon juice into milk and leaving it to stand at room temperature for 15 minutes before using it. The buttermilk helps the scones to become light and fluffy.
- 💡 Pro Tip: Homemade buttermilk is thinner than commercially produced buttermilk. You may not need to use the full amount as it could make your dough too thin and sticky. If using homemade buttermilk, add half the amount to start with and gradually add more if needed in order to make a soft dough.
- Always use cold cubed butter straight from the fridge. If you try to rub in soft warm butter you will be left with a sticky mess. Cold butter helps to keep the dough cool and gives the scones the perfect flakey texture once baked.
- You don't need a rolling pin to roll out the dough. Just shape it with your hands for rustic-looking scones.
- Feel free to halve the glacé cherries, but if you don't have time, don't worry. I quite like finding big chunky whole cherries in my scone!
- For sweet scones, I prefer to use the fluted edge of the biscuit cutter.
- Use wholemeal self-raising flour or half wholemeal and half white.
- Instead of using glacé cherries, try using dried cherries or fresh pitted cherries. If using fresh cherries you will need to increase the amount of sugar in the recipe to 100g.
- Sprinkle the tops of the scones with demerara sugar and flaked almonds before baking, for an extra special crunchy topping.
- Add in 50g of dark chocolate chips for cherry and chocolate scones.
- Don't like almonds? Swap with vanilla extract instead and make cherry and vanilla scones.
- To Store. Keep in an airtight container for up to 3 days.
- To Reheat. Sprinkle the scones with a little water and pop back into a hot oven for a few minutes to warm through.
- To Freeze. Scones freeze really well. Place the cooled scones into a freezer-safe container and freeze for up to 3 months. Defrost at room temperature and reheat in the oven or microwave.
Don't forget to subscribe to the newsletter to stay up to date with what's cooking in the Effortless Foodie kitchen! You can also follow me on Facebook, Twitter, and Instagram too!





Gina
I love a good scone, but cherry almond makes me love it even more! Such a great recipe! This is how l like to start my morning this scone and a cup of tea or coffee!
Savita
These scones look so fluffy and light, the perfect treat!
Tavo
I can't wait to make these scones! I am a big fan of cherries and almonds! Together in a scone... marvelous!
Qashang
Had them for breakfast and they were a winner!
Liz
I'd been making savory scones but I wanted to try my hand at sweet ones and these were great! I love cherries in any form so this is perfect.